Launching a new bastion host
A bastion host is a server exposed to the internet, and acting as a security door to the entire infrastructure.
In our infrastructure, such host runs on AWS on t4g instance for sake of diversity. You'll find a step by step tutorial how to easily launch such an instance.
Launch a new instance in AWS Console
Once logged in the AWS Console under EC2 service, launch a new instance.
Select the architecture and the OS
Select Ubuntu 20.04 64-bits ARM instance.

Select the instance type
Select tg4.nano instance type. No need of a bigger instance for the bastion.

Configure instance details
Specifically in this page, select the VPC, subnet (management subnet) and ensure a public IP is assigned to the node.

At the bottom of this page, use the User data field to customize the instance at startup time using Cloud Init features.
In the example below you can set the $USERNAME you want and its ssh public key $SSH_PUBLIC_KEY,
the ssh port $SSH_PORT you want your instance to listen on, etc...
#cloud-config

# Enable password authentication with the SSH daemon
ssh_pwauth: false

users:
  - name: $USERNAME
    shell: /bin/bash
    lock_passwd: false
    chpasswd: { expire: false }
    ssh_authorized_keys:
      - $SSH_PUBLIC_KEY

packages:
  - apt-transport-https
  - ca-certificates
  - gnupg-agent
  - software-properties-common
  - openssh-server
  - fail2ban
  - python2 # required for sshuttle, since python3.8 is not compatible, see https://github.com/sshuttle/sshuttle/issues/381

runcmd:
  - systemctl stop snapd.socket && systemctl disable snapd.socket
  - systemctl disable snapd.service && systemctl disable snapd.service
  - systemctl disable snap.amazon-ssm-agent.amazon-ssm-agent.service && systemctl disable snap.amazon-ssm-agent.amazon-ssm-agent.service
  - apt autoremove -y --purge snapd
  - DEBIAN_FRONTEND=noninteractive dpkg-reconfigure --priority=low unattended-upgrades

write_files:
  - path: /etc/systemd/timesyncd.conf
    permissions: '0644'
    owner: root:root
    content: |
      [Time]
      NTP=169.254.169.123
  - path: /etc/ssh/sshd_config.d/bastion.conf
    permissions: '0644'
    owner: root:root
    content: |
      Port $SSH_PORT
      PermitRootLogin no
      AllowUsers $USERNAME

package_update: true
package_upgrade: true

power_state:
  mode: reboot
Please note in this config, the bastion host won't have any user with sudo privileges, meaning you won't be able to install any packages on it. You'll need to create another bastion host if you want to change anything.
Add storage
Very little storage is required, i.e. the default 8GB is more than enough. Mind enabling disk encryption though.

Add tags
A tag Name is recommended, such as $project-bastion-$indice-g-$yyyymmdd (g to mention it's a Graviton2 instance, a.k.a t4g)

Add security groups
This part is rather specific to your setup, but the idea is to have at least one security group allowing inbound SSH traffic on your custom port to your instance.
We're using two security groups on our side:
- $project-ssh-inbound-only, which allows inbound traffic on our specific SSH port
- $project-is-bastion, which allows outbound SSH traffic to the other hosts in the infrastructure.
If you randomize the SSH port, the wizard might warn you don't have any rule to allow access on port 22, but that's ok, we know what we're doing.
Launch!
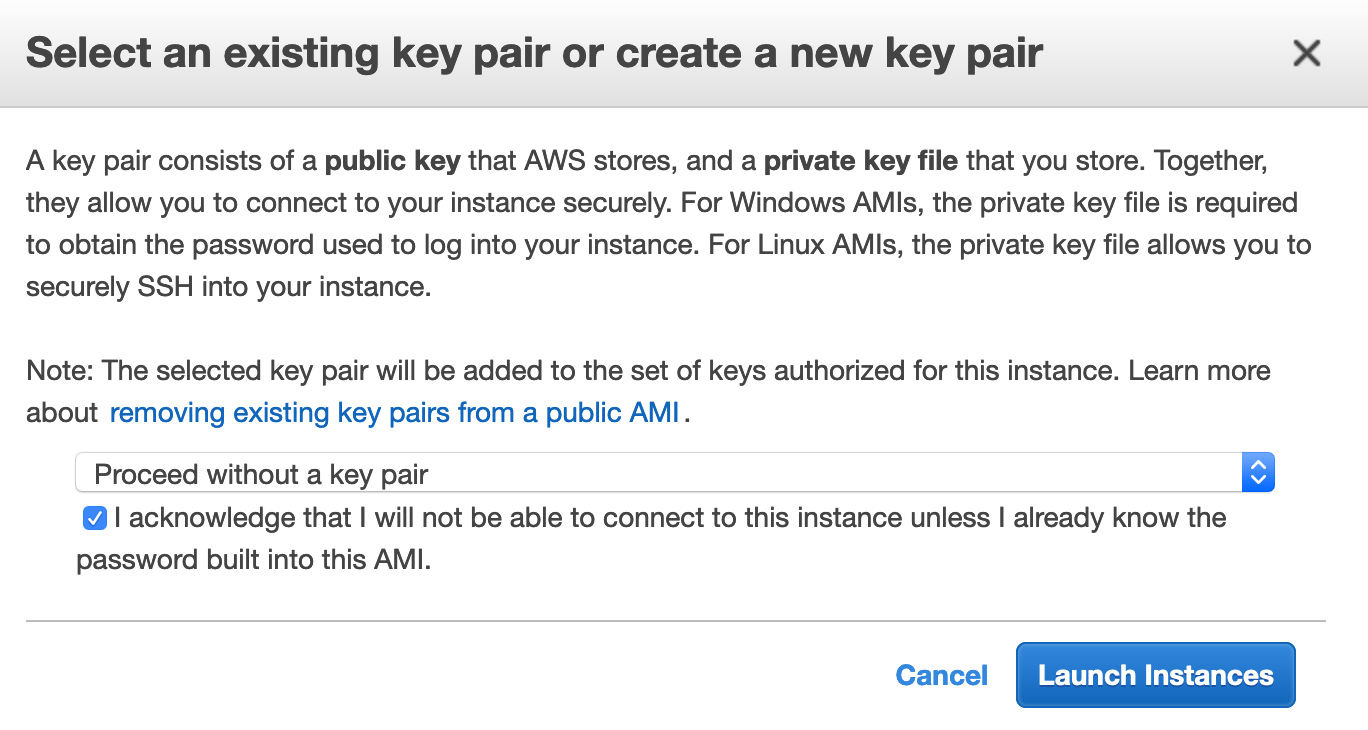
You can now launch your instance. A final step to select the key pairs is required. Since we provide th key pair via Cloud Init, you can choose to proceed without a key pair.

SSH config
Last but not least, a bit of configuration of your ssh setup is required to access seamlessly the bastion and the underlying hosts.
Edit your ~/.ssh/config file or equivalent, and add the bastion host and another one to use the bastion.
$BASTION_HOST_PUBLIC_IP is the bastion's public IP assigned at launch time
$SSH_PRIVATE_KEY_PATH is the path to the private key corresponding to the public key $SSH_PUBLIC_KEY
we set in the cloud-init file.
We assume there is another host, called host-01, which will be reachable using its private IP
through the bastion.
Host bastion-01
    Hostname $BASTION_HOST_PUBLIC_IP
    Port $SSH_PORT
    User $USERNAME
    PreferredAuthentications publickey
    IdentityFile $SSH_PRIVATE_KEY_PATH

Host host-01
    ProxyJump bastion-01
    Hostname $HOST_01_PRIVATE_IP
    User $USERNAME
    PreferredAuthentications publickey
    IdentityFile $SSH_PRIVATE_KEY_PATH
Sshuttle
Sshuttle is a poor man's VPN, allowing to access private ip addresses using SSH. It fits perfectly in the bastion host's setup, allowing to grant access of nodes behind the bastion.
Assuming your VPC private network is 10.232.0.0/16, use it the following way:
sshuttle -r bastion-01 --python /usr/bin/python2 10.232.0.0/16
And now you can safely access http://$validator-private-ip:7500 to access your validator dashboard.